Art Direction: Drew Gonzalez, Scott Laserow
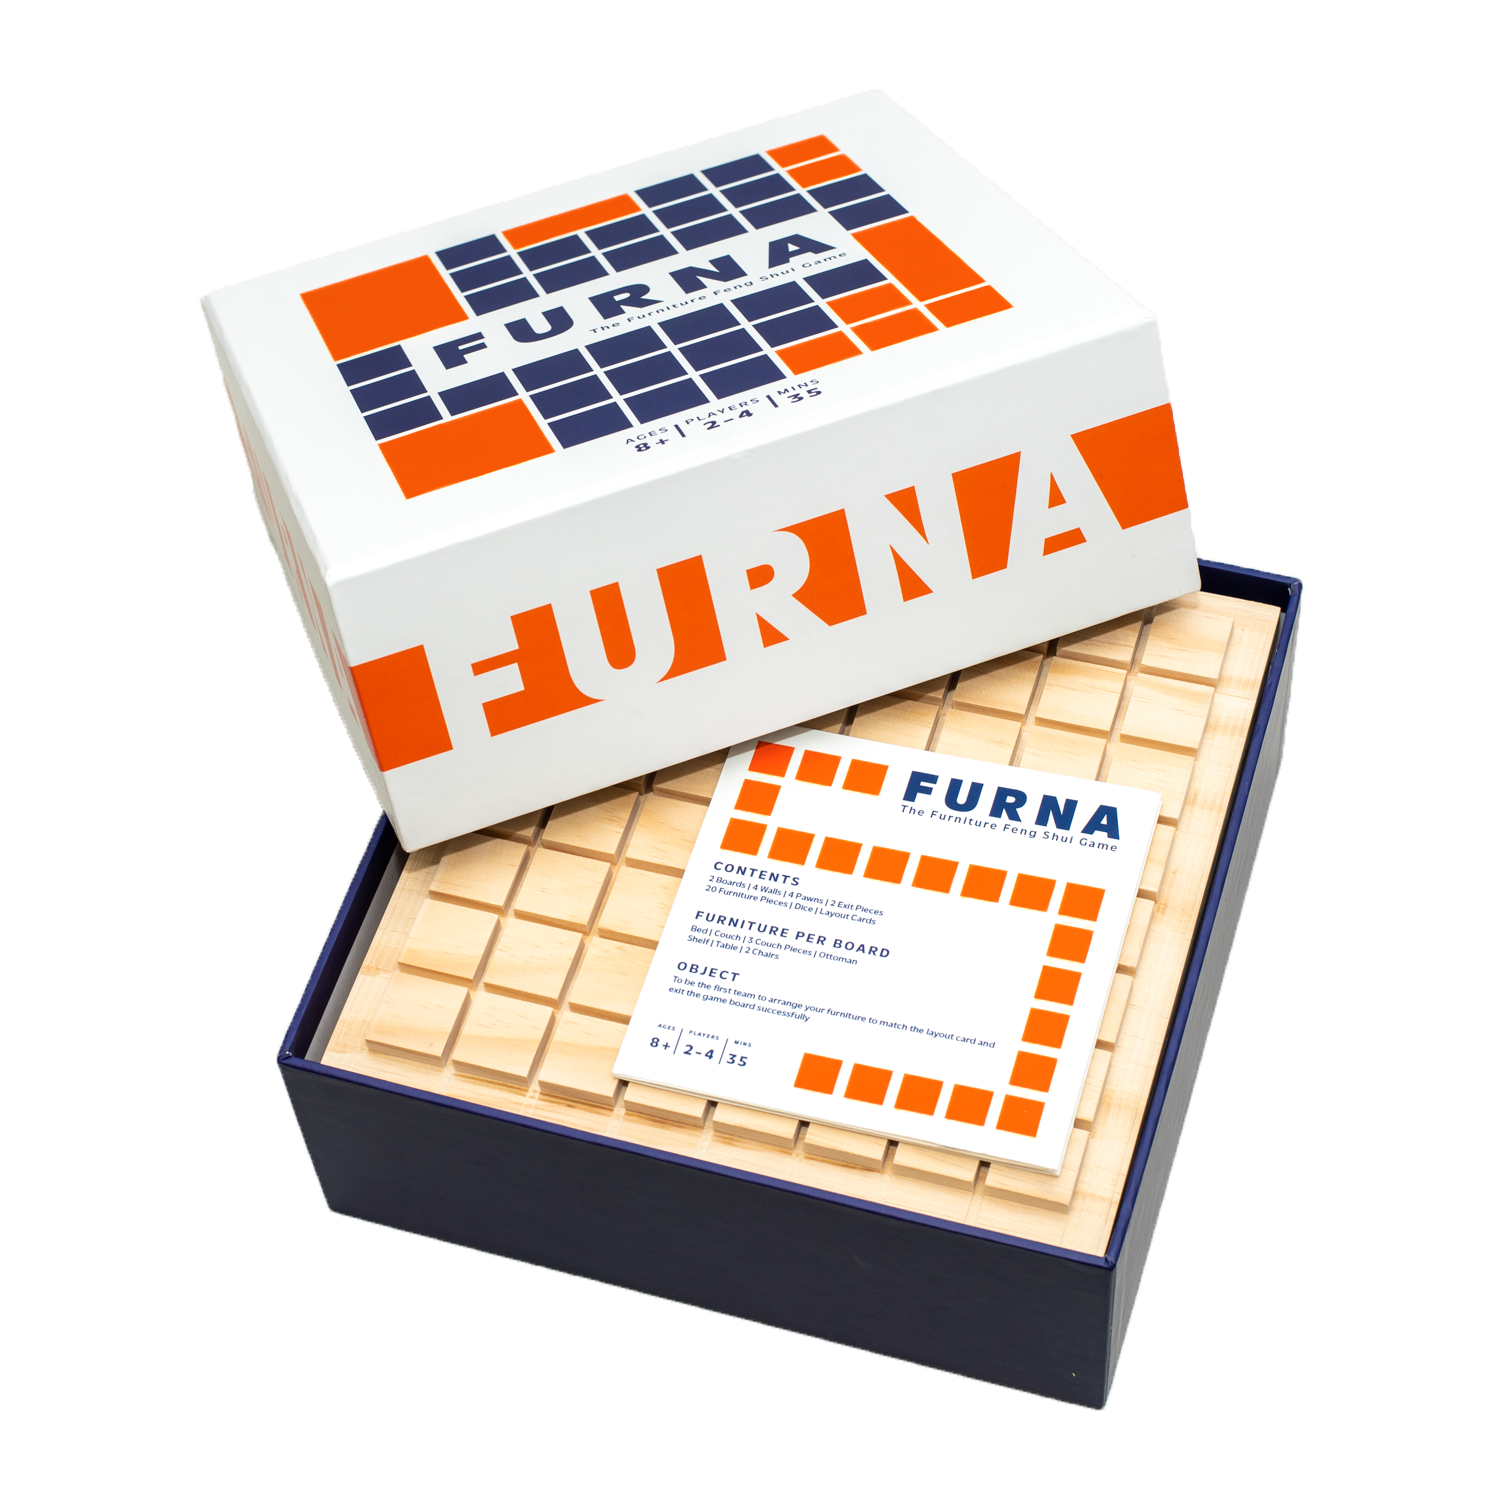
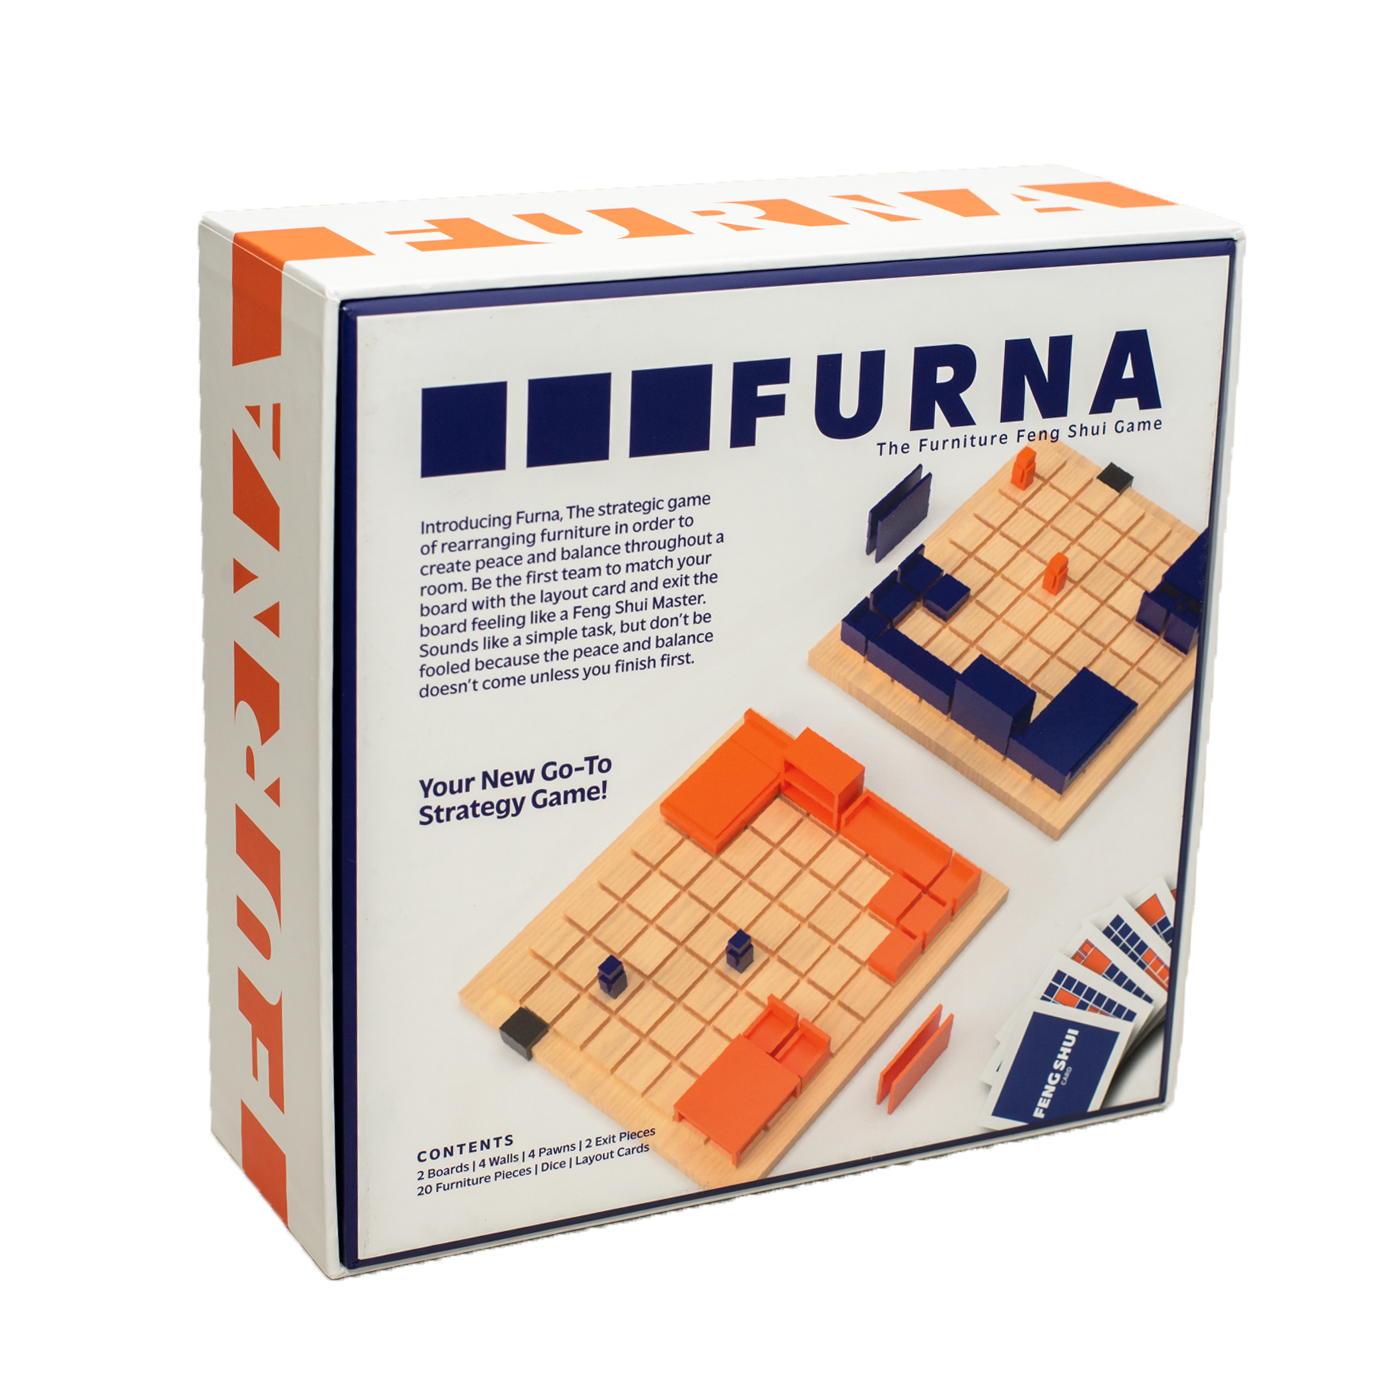
Introducing Furna, The strategic game of rearranging furniture in order to create peace and balance throughout a room. Be the first team to match your board with the layout card and exit the board feeling like a Feng Shui Master. Sounds like a simple task, but don’t be fooled because the peace and balance doesn’t come unless you finish first.
OPENING
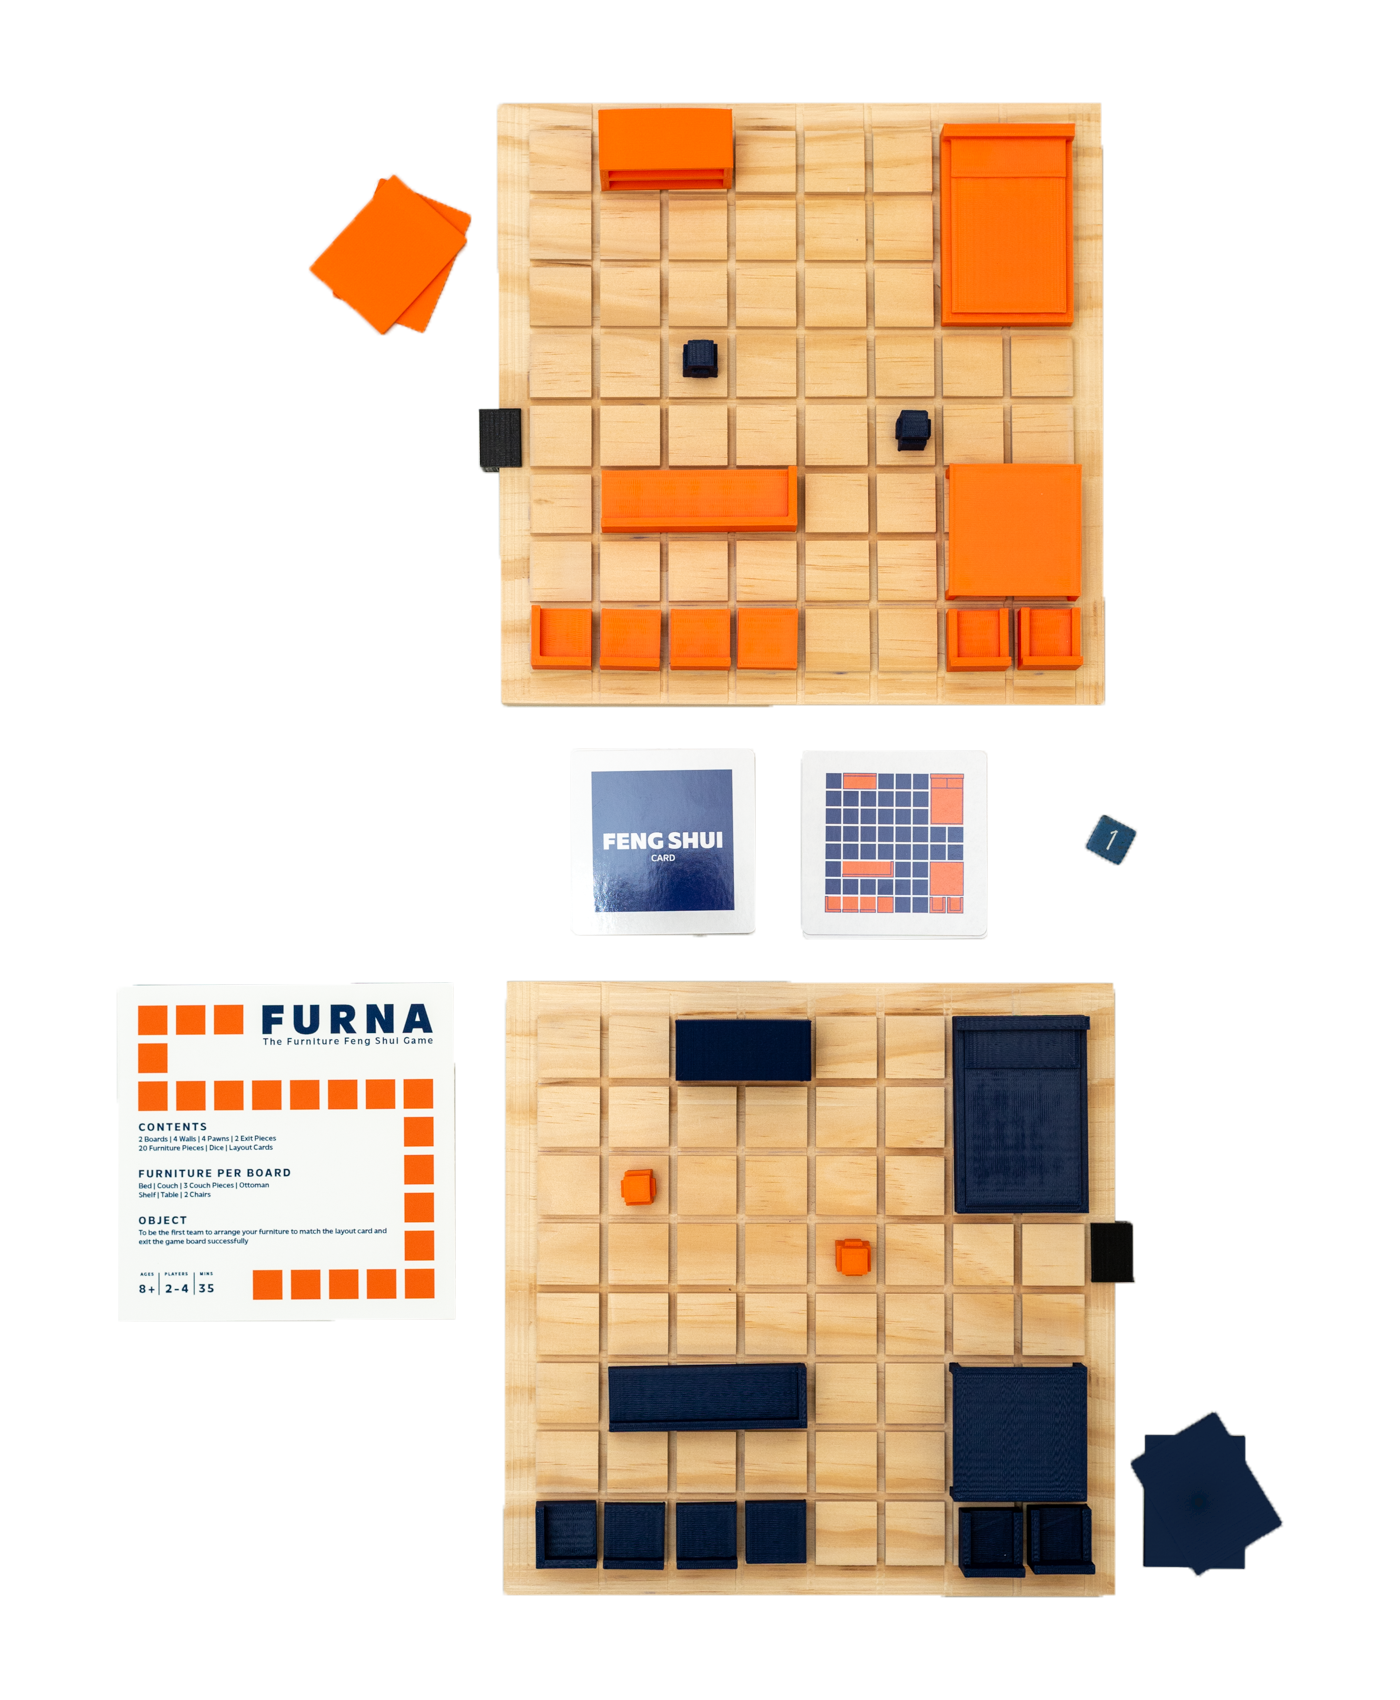
Furna represents a captivating strategic board game, whose premise revolves around the creation of a harmonious feng shui ambiance within a designated room. The game accommodates four players, who are divided into two teams, and engage in a gripping head-to-head competition, maneuvering furniture pieces in a quest to achieve the designated layout. The ultimate objective of each team is to exit their board prior to their opponents, as well as showcasing their adeptness at manipulating the game to achieve their desired outcome.
IDEATION PHASE
My overarching objective was to design a riveting and cerebral game, replete with intricacies that would keep players on the edge of their seats. To this end, I sought to incorporate innovative gameplay mechanics that would introduce a high degree of unpredictability, with even a single move having the potential to change the outcome of the match.
WHERE THE NAME ORIGINATED
The start of Furna can be traced back to its name. To arrive at a fitting title for the game, I delved into a plethora of furniture-related and interior design terms, casting a wide net for inspiration. After compiling a list of several options, I found myself fixated on the name "Mini Movers" for a week. However, upon creating a mood board to guide the game's aesthetics, I began to question the suitability of the chosen name, leading me to revisit the naming process. Guided by the desire to reflect the game's modern and sleek appearance, I opted for a more contemporary name that was not already in use. After much contemplation, I settled on "Furna", an abbreviation of the word "Furniture," where the substitution of the vowel "i" with "a" yielded a more euphonious name. This, I knew, was the perfect moniker for my board game.

CREATING AND PRINTING THE INSTRUCTIONS
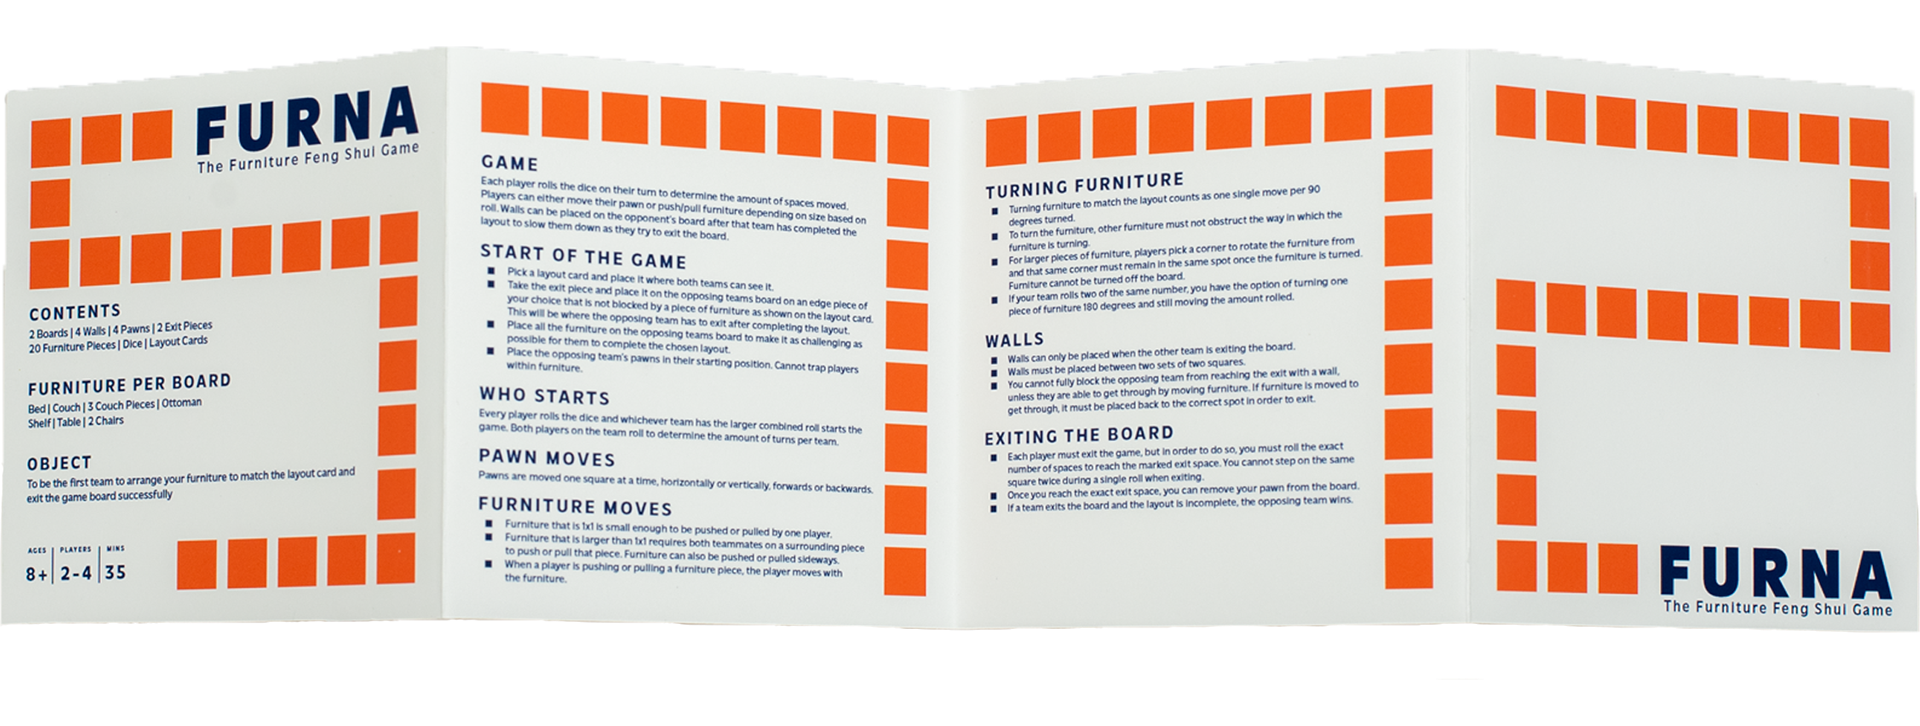
The next step of the process was to write the instructions for the game. I drew inspiration from many other games that I love to play at game nights with my friends. Having looked at many instructions for multiple board games for inspiration, I found it was best to keep the instructions simple while being as thorough as possible. This step of the process worked out most of the kinks to the game because when I had others review the instructions, they had many questions about the rules which let me know where I needed to be more specific. I also learned more about what to make more clear on the instructions when I did a test run of the game and ran into questions I had when playing. When it came to printing the instructions, I chose an enhanced matte heavy stock paper to give weight and a richer look to the paper itself. I also decided an accordion fold was the best build for the instructions as they were 3 short pages in length.
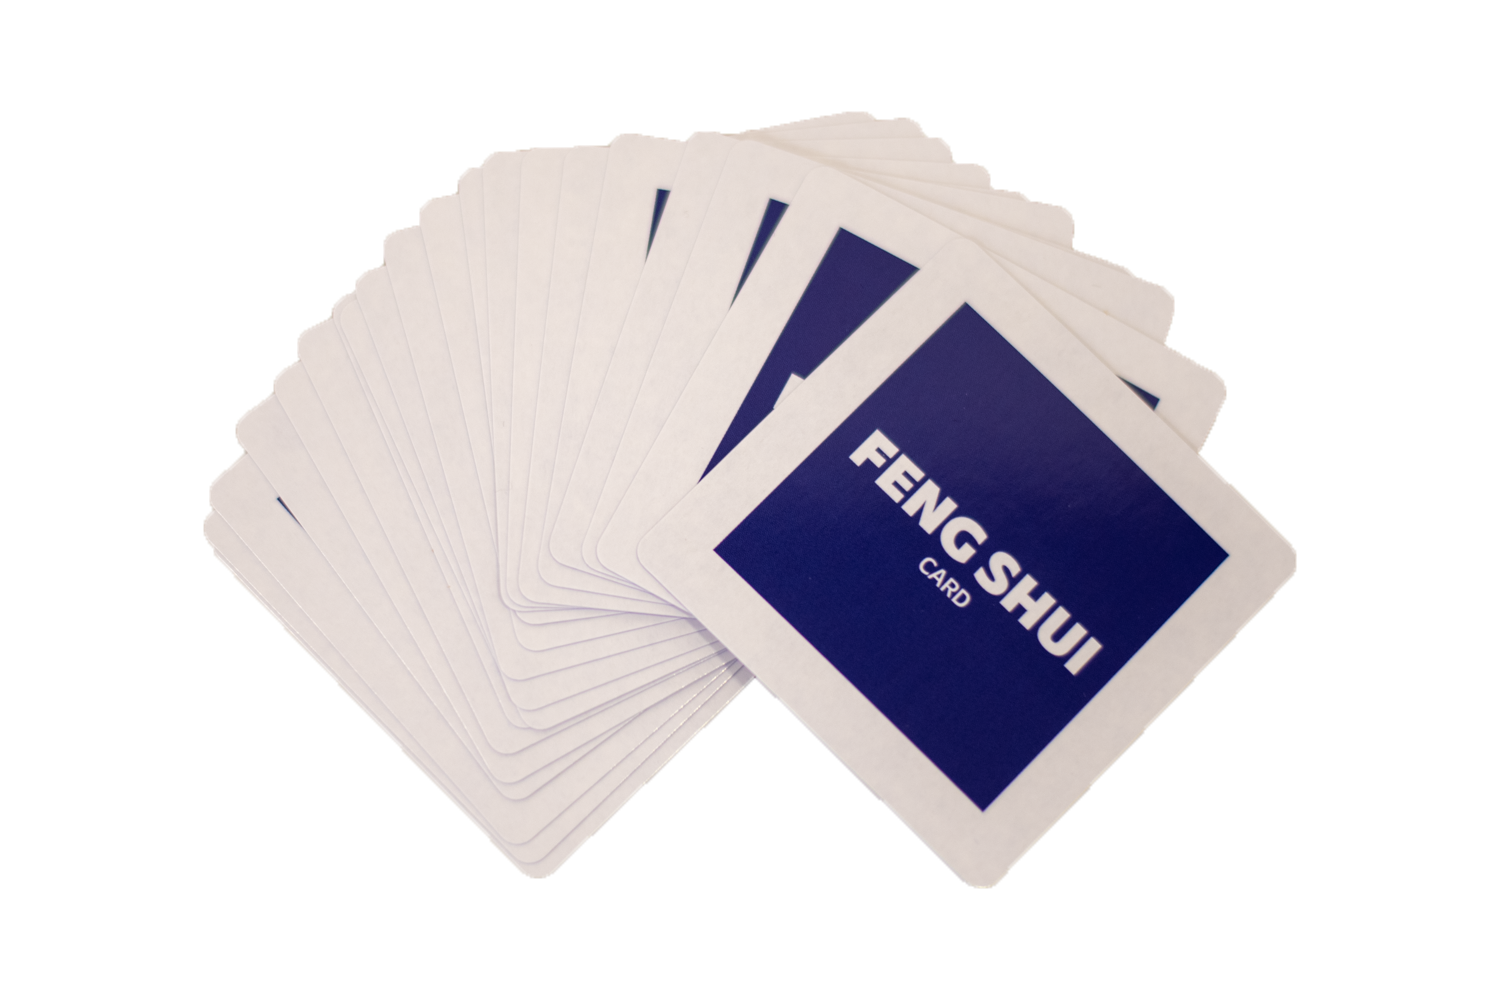
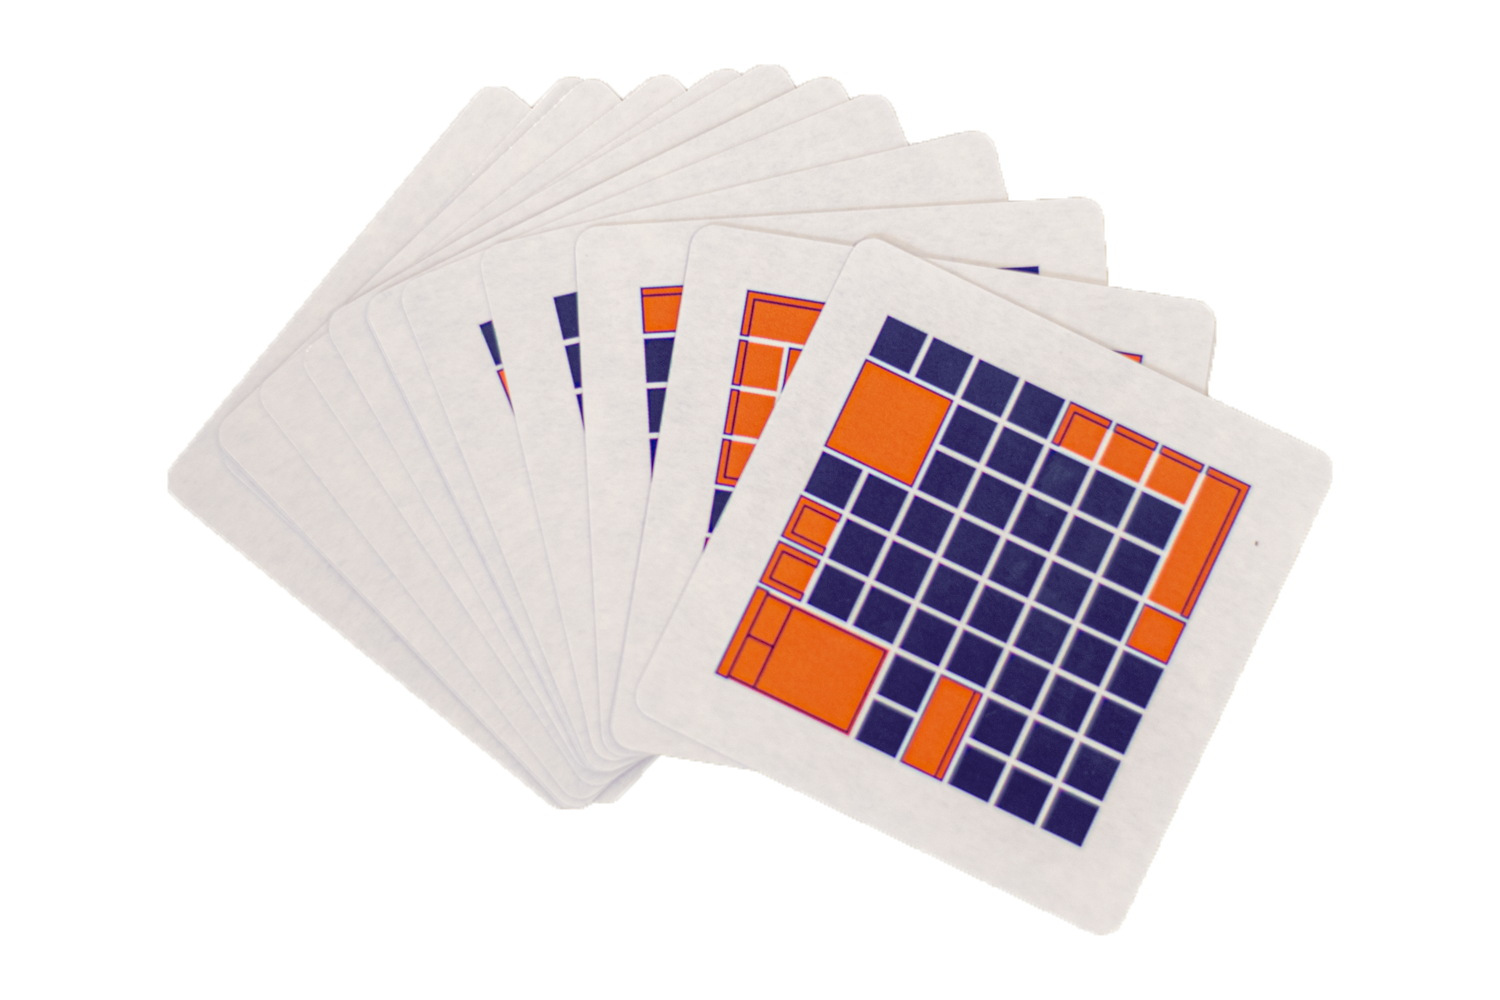
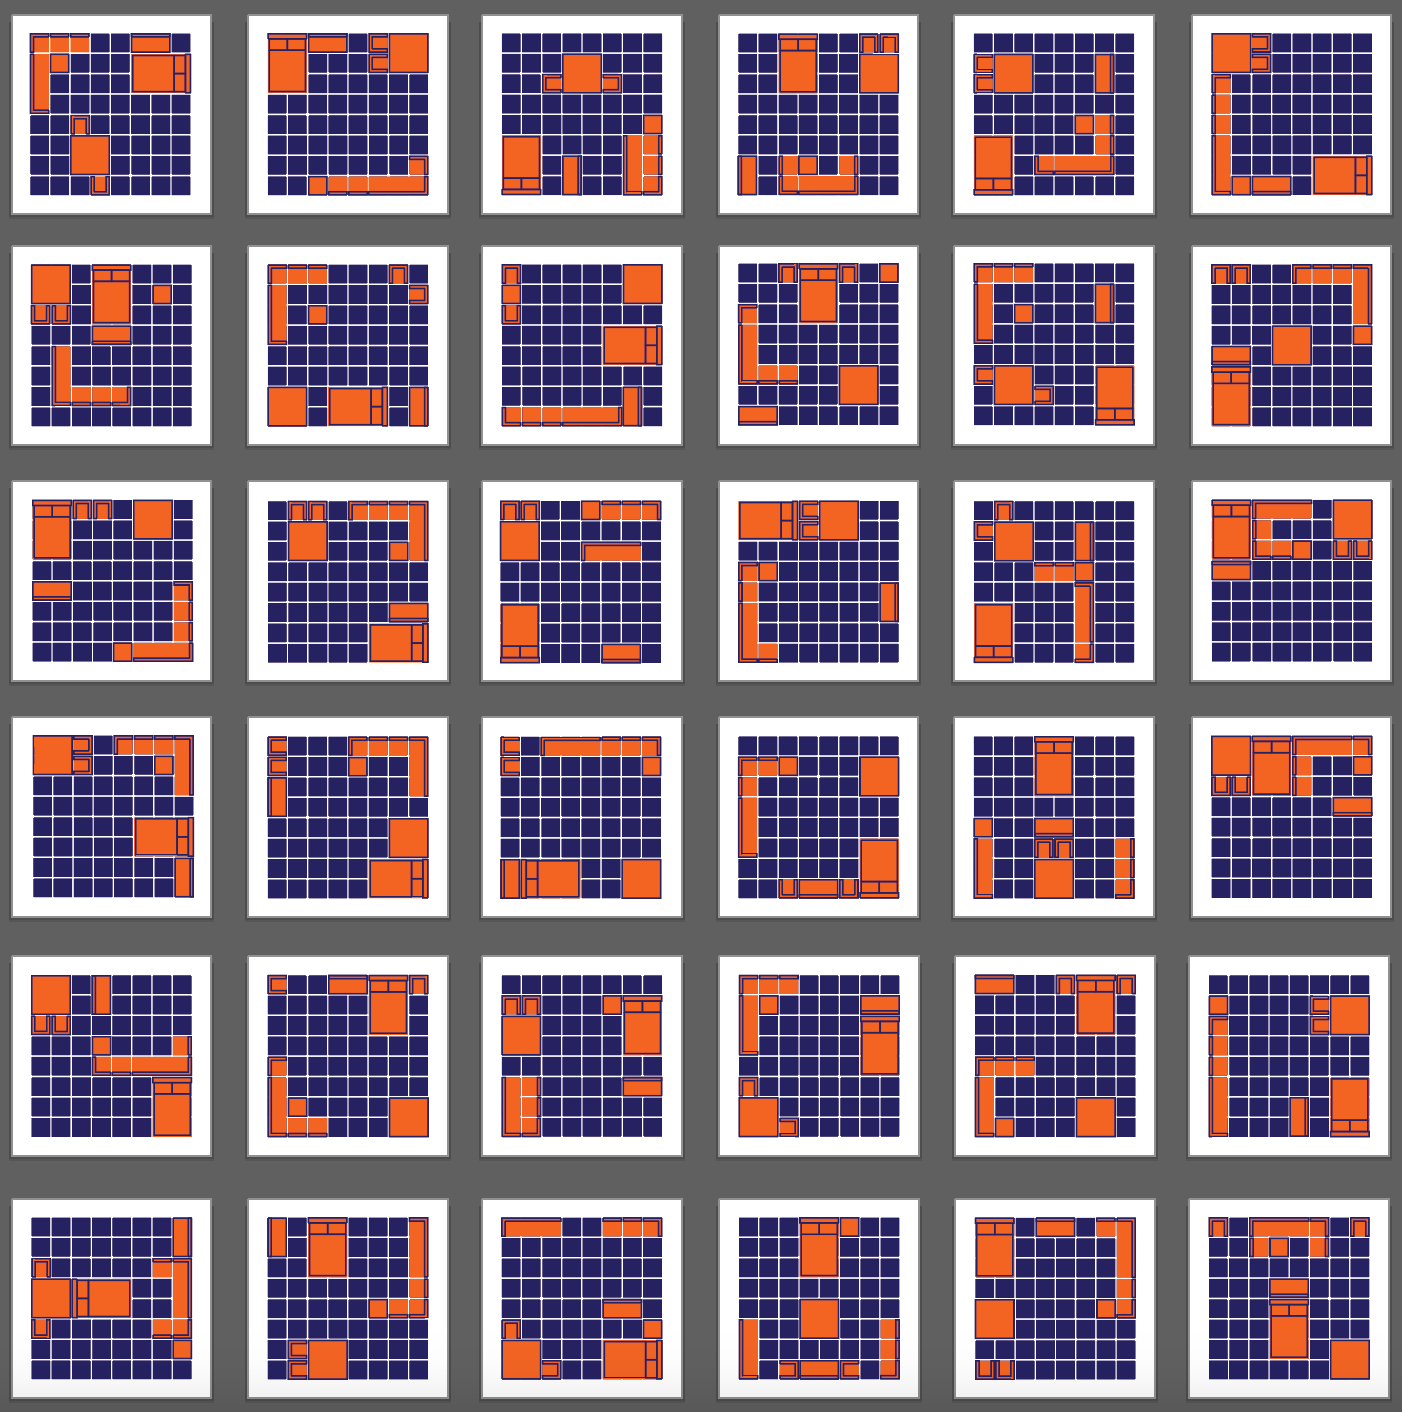
FENG SHUI CARDS
WOODWORKING ON THE TABLE SAW
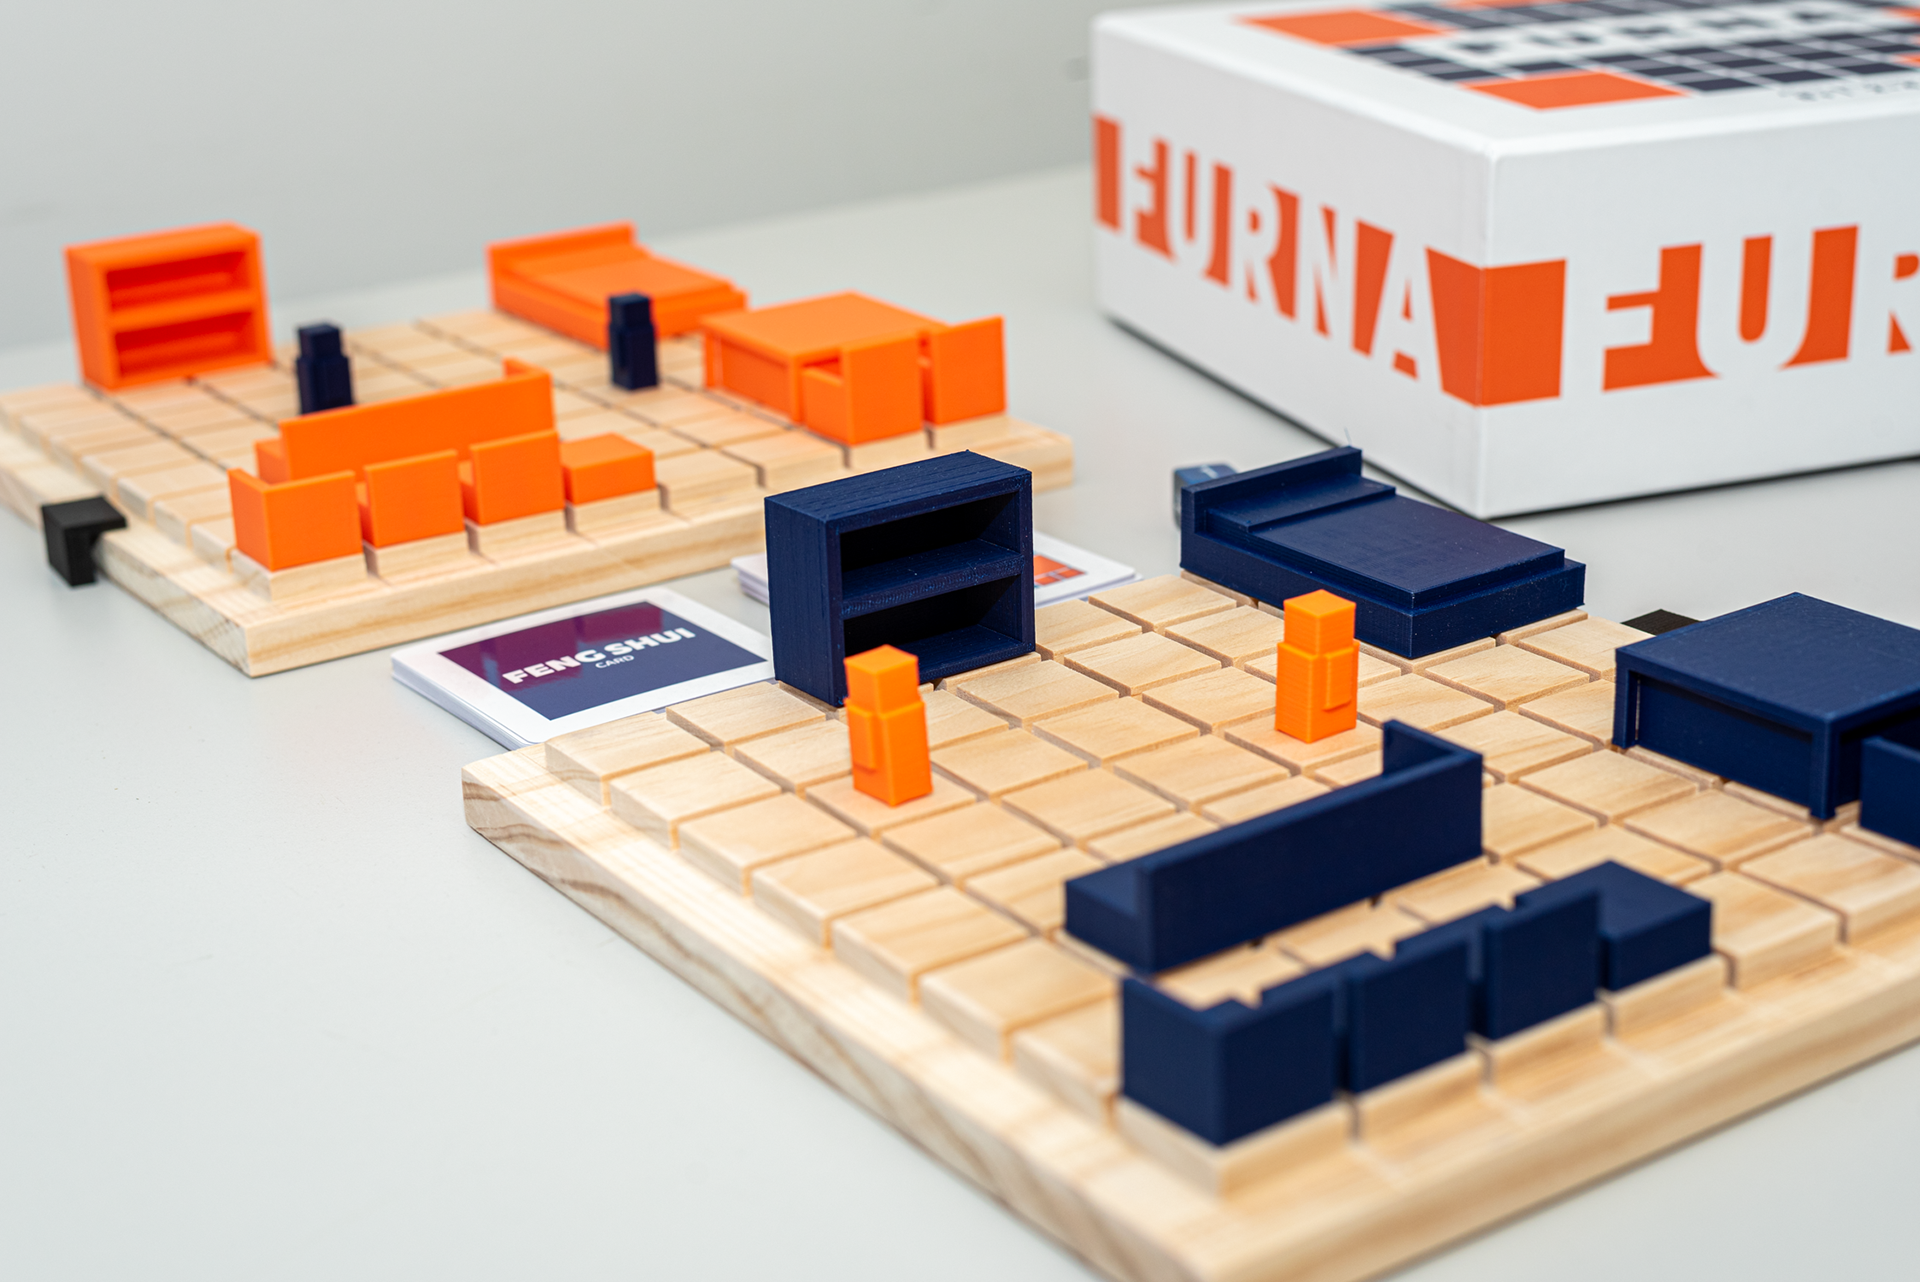
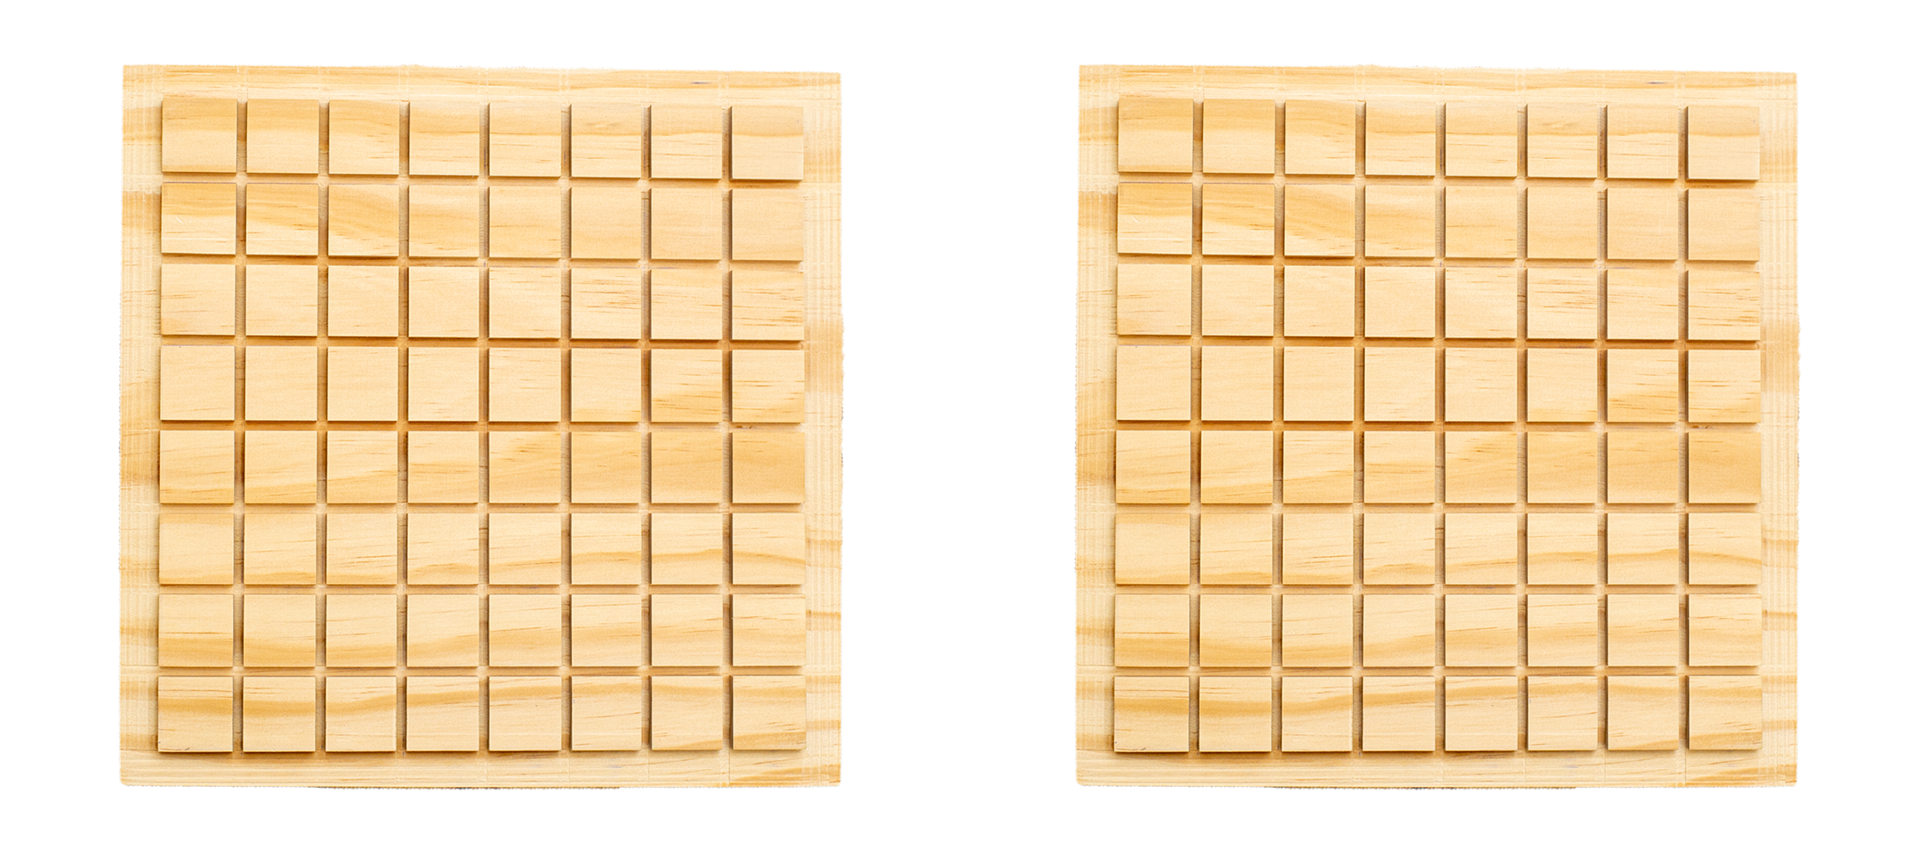
After the instructions were complete, I headed to Home Depot to get materials for my board game. I acquired some pine wood for the boards themselves which were going to be a natural wood color for the look I was going for. I chose two 8x8 boards for the game in which I measured out all the cuts on the boards before moving to the table saw to create the perfect grid on each board. After the table saw, I sanded the wood and then sealed and polished it. Originally, I was also going to make the furniture pieces out of pine wood as well, but ran into an issue where the pieces would not look as clean as I wanted them to due to certain intricate cuts. After not being satisfied with what the pieces would look like out of wood, I decided it would be best to 3D print the pieces which led me down another rabbit hole.
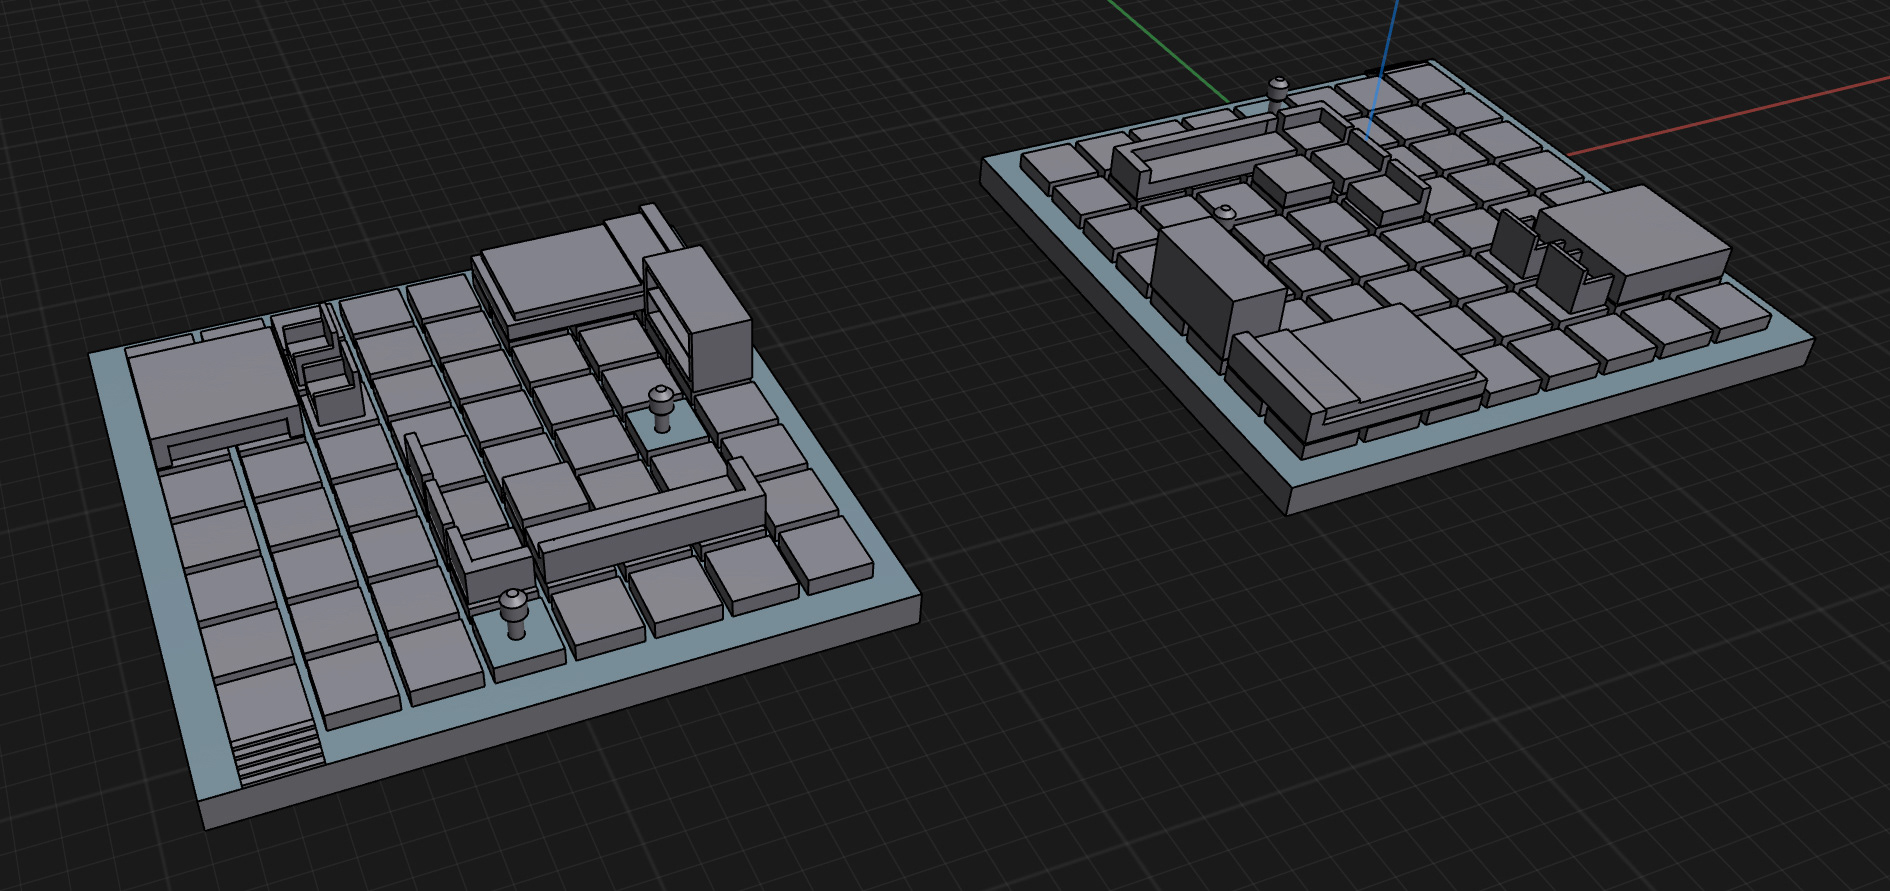
3D MODELING
The process of working in 3D was fairly simple and fun to work with. I had to measure the already made game board to ensure my pieces would come out fitting perfectly. I made 3D models of each piece I needed printed on TinkerCAD and then the process went quick from there. The pieces came out perfect and the colors matched perfectly as well.
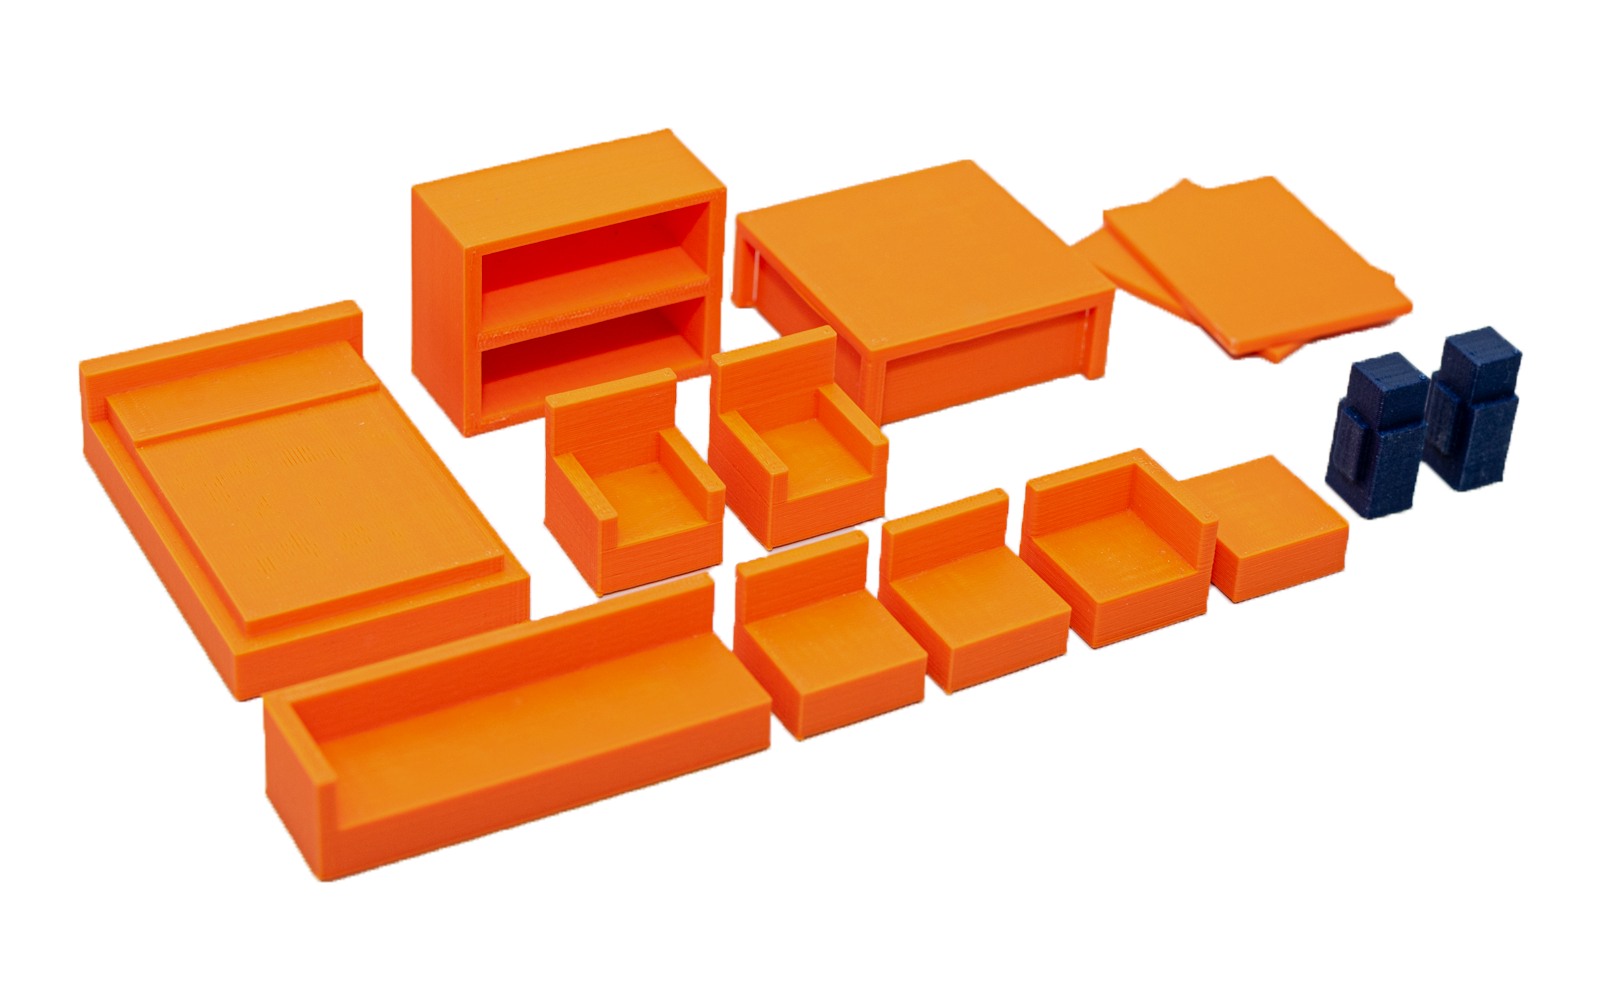
3D PRINTING

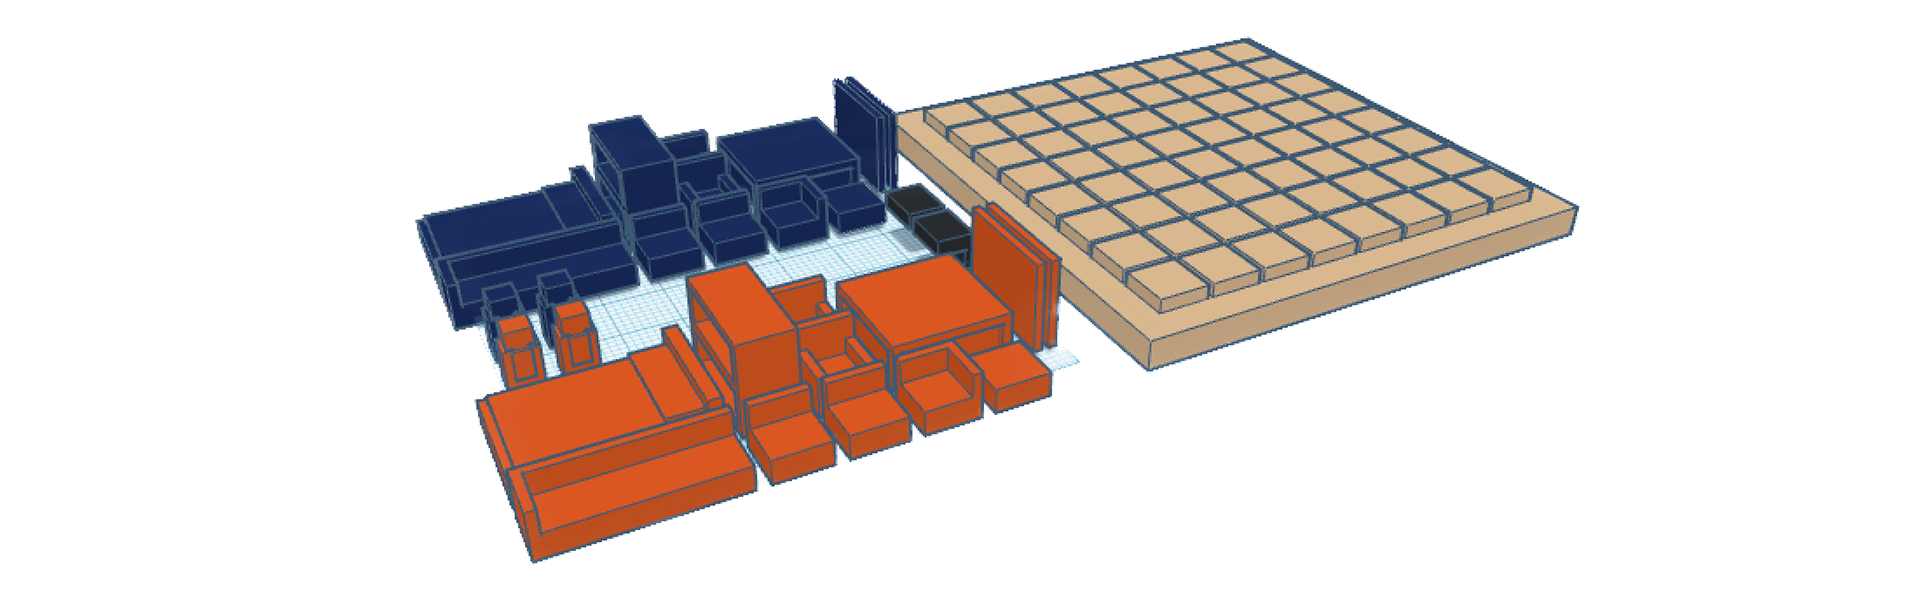
3D RENDERING
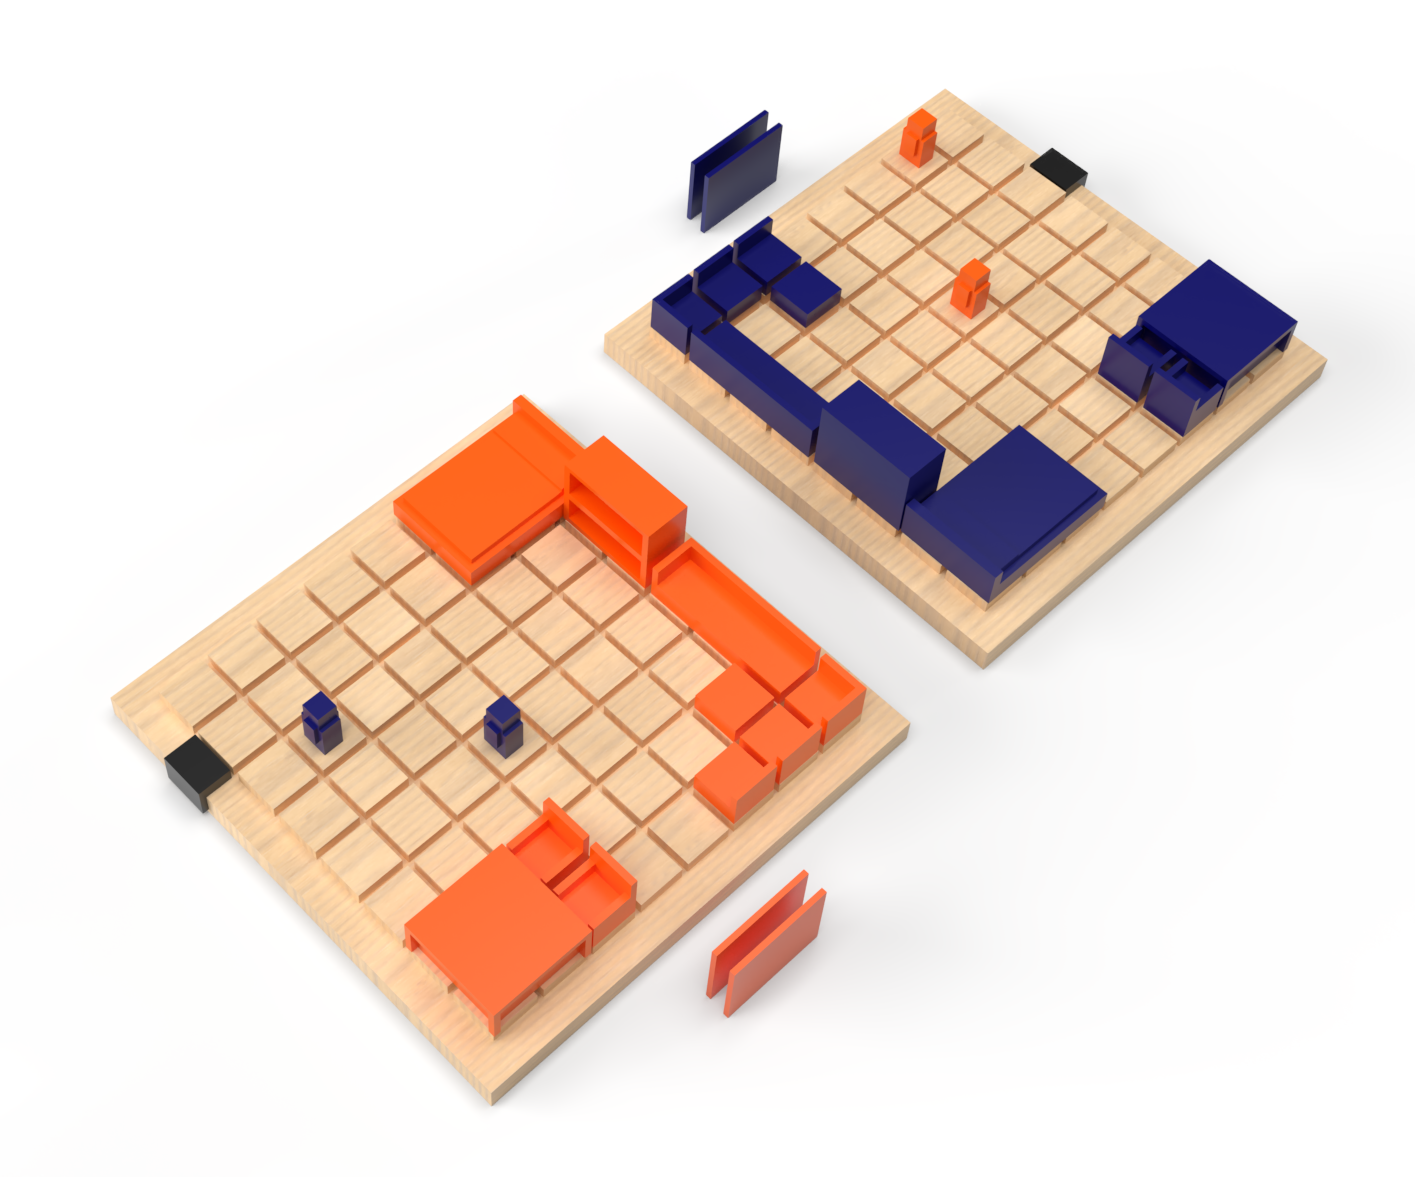
Aside from modeling and printing, I also worked with Adobe Substance 3D Stager to model the board game and get a render of what the game would look like. I used this render for the back of the box to give an insight to the buyer of what is inside the box. The reason I modeled the game on Stager was because the game was not complete and I could not get an actual photograph of the game laid out before getting the box made.
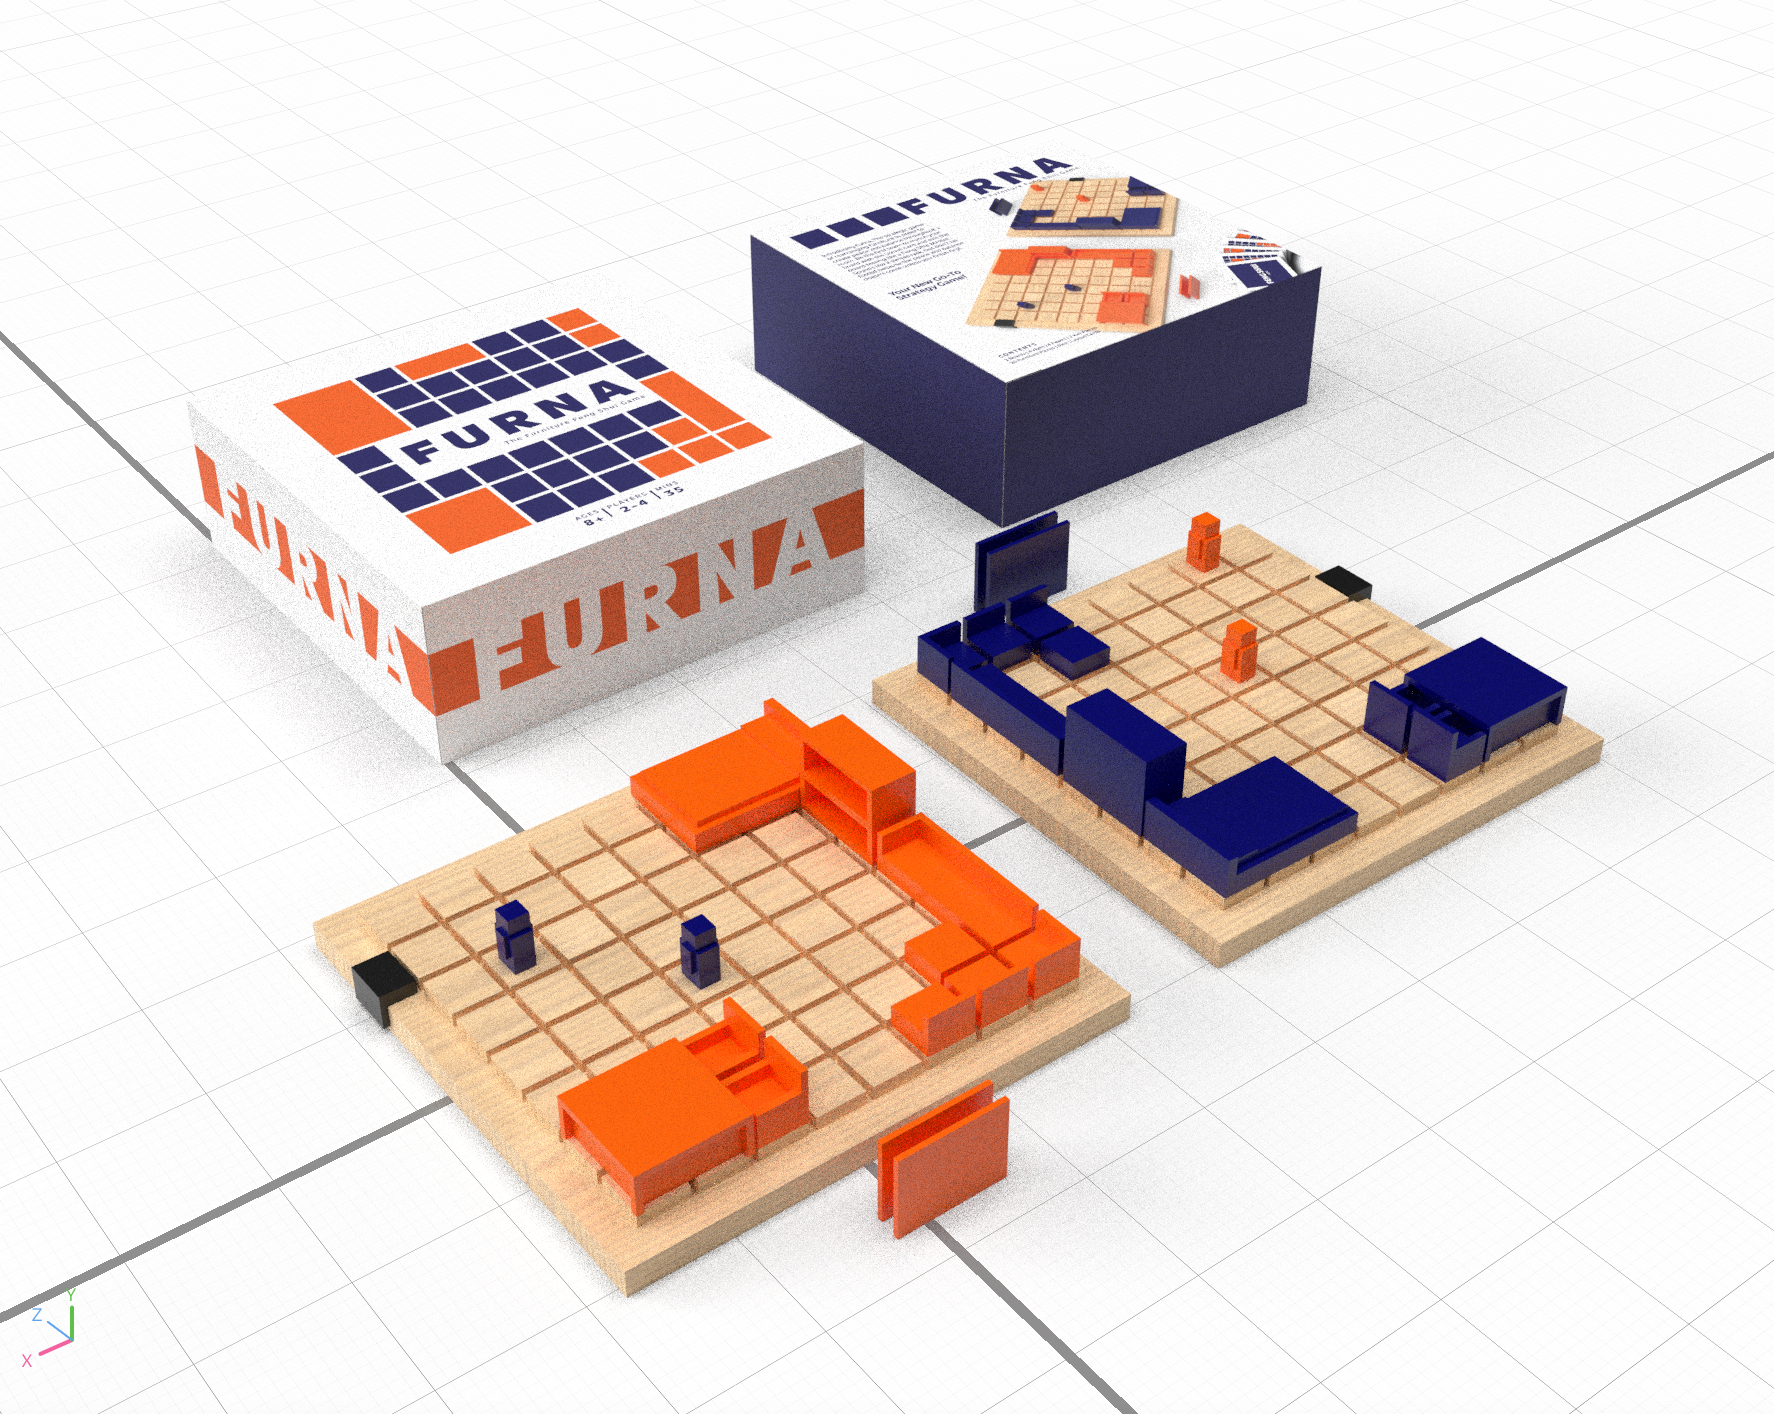
IMAGE ON BOX
BEHIND THE BOX
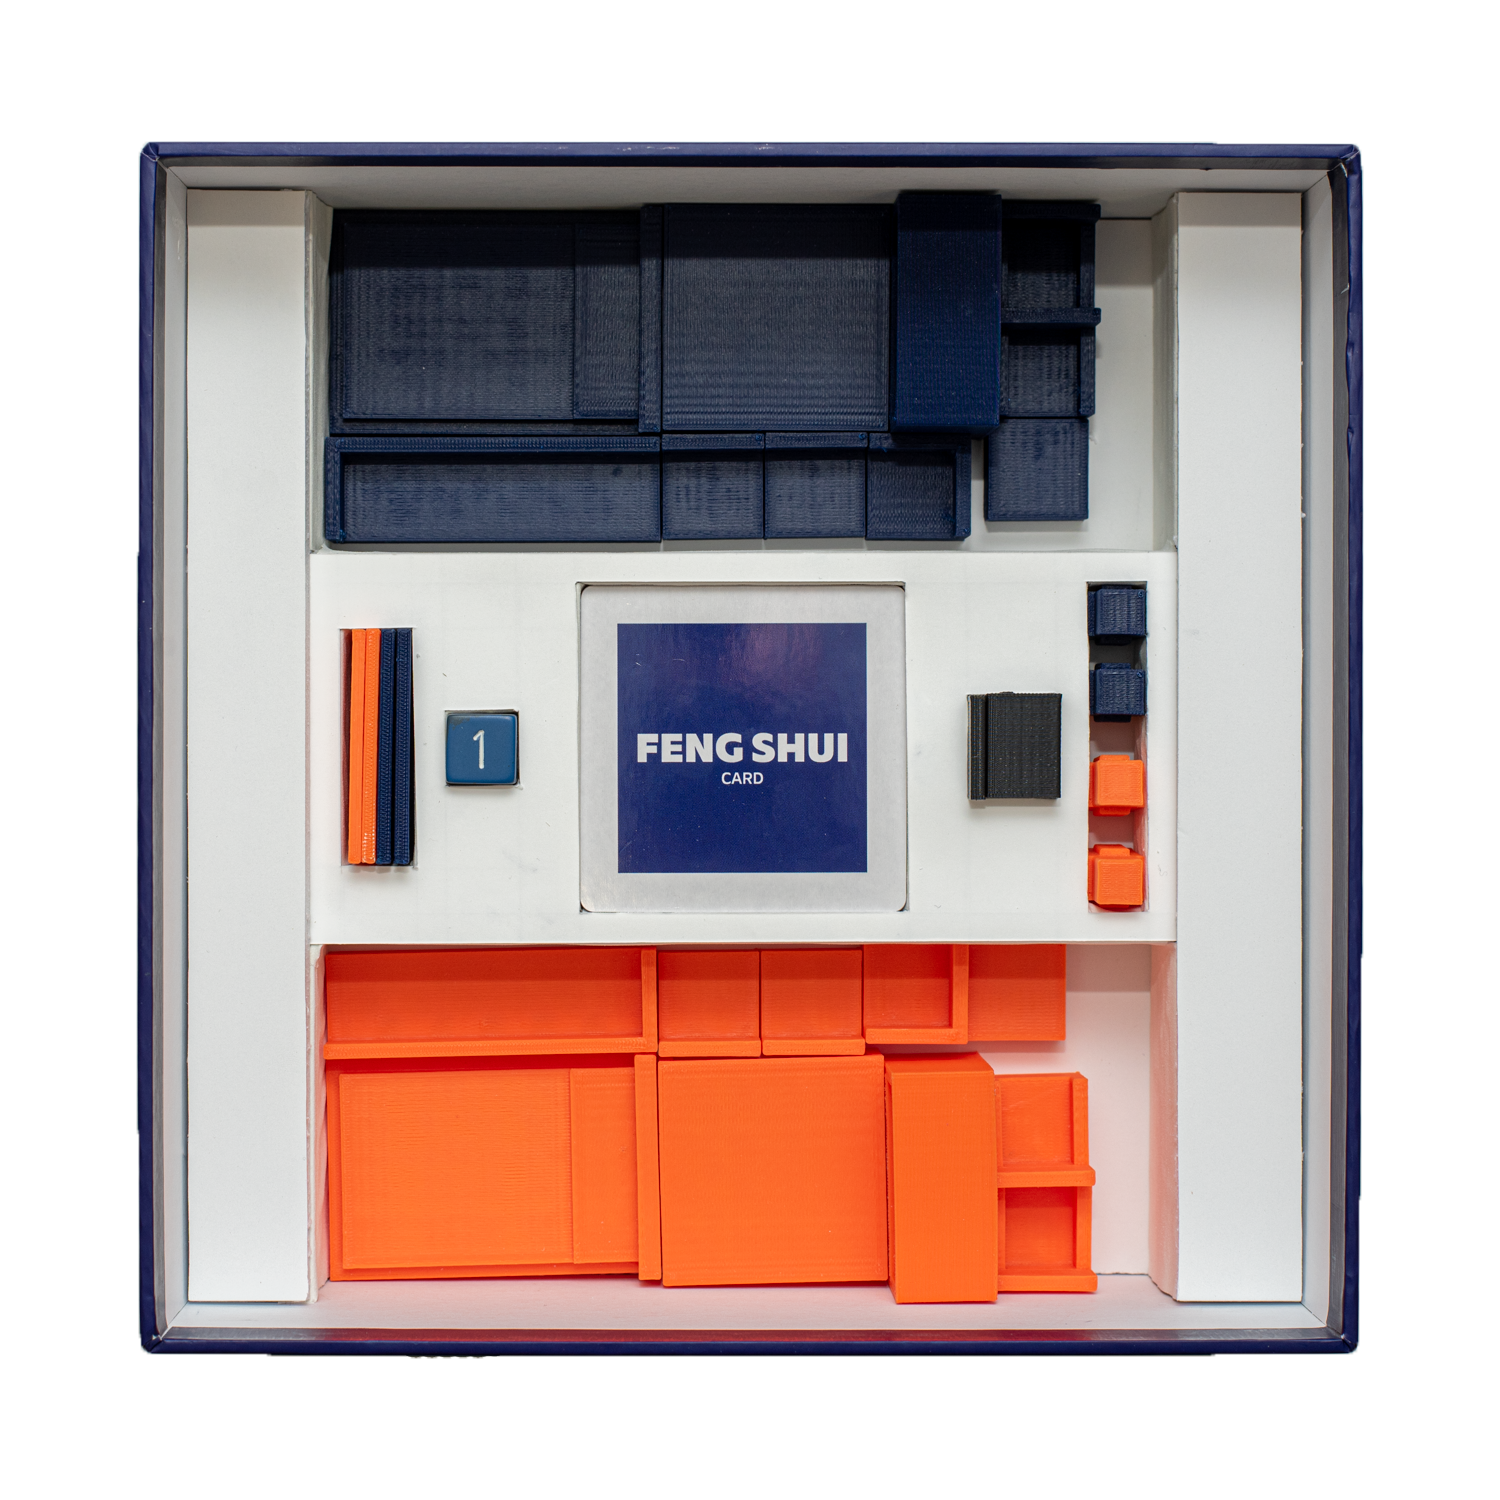
The design of the box was a very long process and required lots of research. The actual design of the top of the box came about pretty quickly and then the bottom of the box needed an image of the board game on it to show what was inside the box. Almost all board games show an image of the game on the back of the box, but without the game being finished I decided it was in my best interest to build a 3D render of the game in Adobe Substance Stager which was a great idea considering I could set the game up in any position and then render for a glimpse at the board game. After getting the render finished, I pasted it on the bottom of the box design and added the finishing touches and it came out perfect. As for printing the box and building it, that gave me the biggest issue of this project. I went through many test prints on different types of paper and did research on where to get high quality paper that would be as thin as I needed it as well as super durable. This paper just did not seem to exist anywhere on the market and could only be found at places that make board games and packaging. I could have settled for a box that didn’t look as great but that wasn’t an option. After I had already built 3 boxes out of chipboard, I scratched that idea and sent the box and my cards to be professionally printed and made. When they finally arrived, I was in awe at how great they turned out and I knew I had made the right decision. I was then able to get the measurements of the inside of the box to make the insert fit perfectly. The insert was made of stacked foam board which I cut wells into for the right fit of my pieces in the box. This brought my box design to the next level.

EXPANSION PACKS COMING SOON
I came across many problems along the way as well as solutions. With the completion of Furna, I have already started brainstorming what could possibly come next and with that, I have thought of future ideas for Furna such as expansion packs that come with different furniture and layout cards to go with themes of different rooms in not only houses but also other spaces such as restaurants or hospitals. The themes for the future expansion packs are truly endless!